
For several years now, you have been able to use the lifecycle management feature of AWS S3 to control the storage class and the lifetime of your objects.
Since last March, a feature has been added to this service: the incomplete multipart upload of an object. This multipart upload lets you upload a single object made up of a set of parts. Once all the parts of that object have been uploaded, Amazon S3 presents the data as a single object.
Thanks to this function, you can manage uploads in parallel, pause and resume the upload of an object, and also start uploads before knowing the total size of the object.
What is an incomplete multipart upload of an object?
The AWS S3 multipart upload function speeds up the transfer of large objects by letting you split them into several logical parts that can be uploaded in parallel.
If you start a multipart upload but do not complete it, the upload in progress will take up storage space and will incur storage charges.
However, these uploads are not visible when you list the contents of a bucket. They absolutely must be deleted. If they are not deleted, the storage space consumed by these uploads will continue to be billed.
How do you know whether a bucket contains multipart uploads?
Here is a small script that can help you find which bucket has multipart uploads:
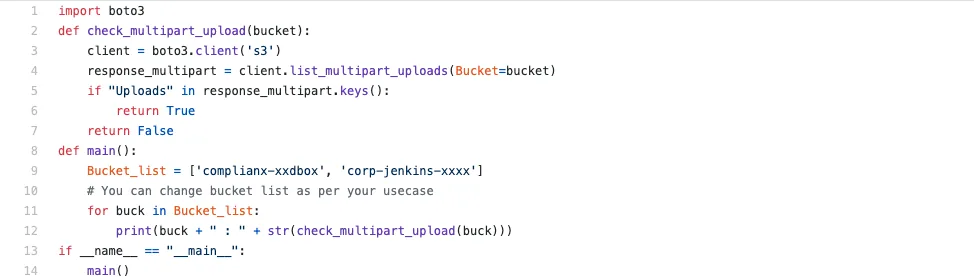
This script will give an answer like this one:

“True” means that this bucket has multipart uploads. “False” means that it does not contain any.
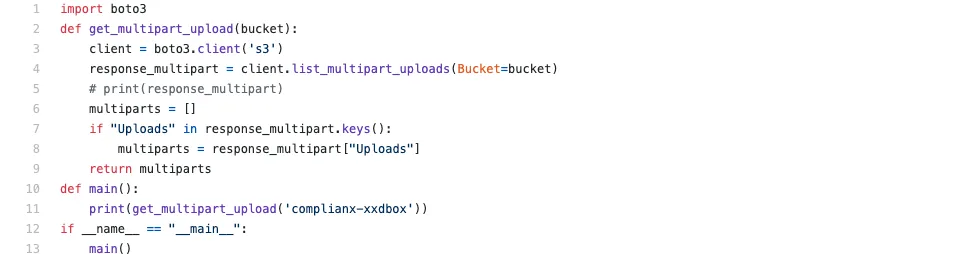
How can I get a list of multipart uploads?
Here is another script that will help you get a list of multipart uploads:
How do you avoid the unnecessary cost of incomplete multipart uploads?
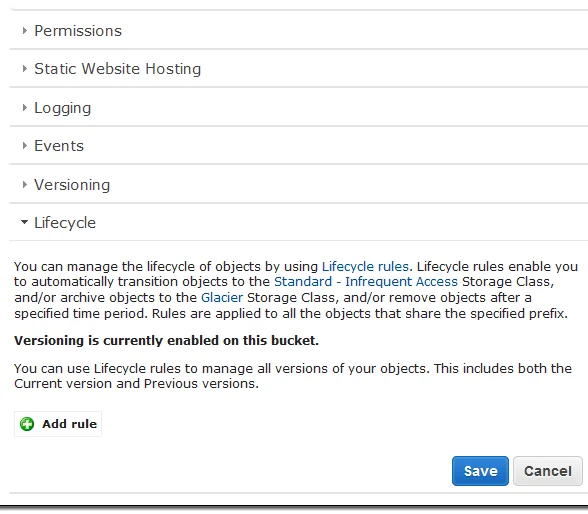
To do this, you can configure a lifecycle dedicated to these uploads. Once the allotted time has elapsed, they will be automatically deleted from the storage space.
You can configure them using the AWS Management Console, the AWS command line interface (CLI) or the AWS Tools for Windows PowerShell.
1. Start by opening the console and go to the bucket you want:

2. Then click on “Properties”, open the “Lifecycle” section and click on “Add rule”:
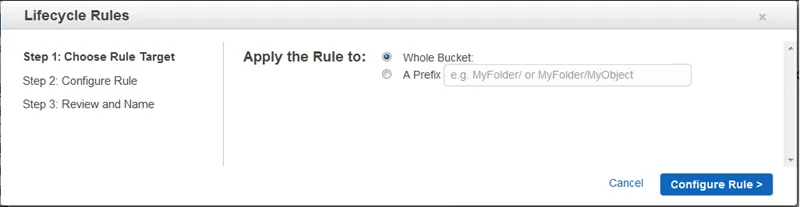
3. Choose your target (the whole bucket or the prefixed subset of your choice) then click on “Configure Rule”:
4. Then enable the new rule and select the expiration period you want:

If you would like more information on this new AWS service, do not hesitate to contact the team at Premaccess. Specialising in the AWS Cloud, it will advise you on this subject.